LESSON 11
LESSON RECAP
After all the preparation we go through, after all the moodboards, and location scouts, and conversations with clients, there's something very satisfying about finally pressing the button. About finally capturing the image we've been after. And it's easy to think that our work ends there. But there's still so much to do!
Editing an image in post-production is no less important than shooting it. In complex portrait photography there is no situation where you would submit a photo without editing it first. No matter how good it is when it comes out of the camera, it can always be better.
There are two main tools I use for editing: Adobe Lightroom and Photoshop. But before we get into the technical questions, it's important to understand that these apps are just tools. They can help take your photos to a whole new level, but only if you have a clear idea of what you want.
Many people will tell you about rules that must be followed in post-production, rules that you should never break. But there are no rules here! There are editing techniques that work for most photographs, and then there are techniques that work best for your photographs. Today I'm going to tell you what works best for me, and why. Let's get started!
COLOR GRADING
Behind every edit I make, there are two main goals. First is to focus the viewer's attention by reducing the number of distracting details. Second is to add my visual style.
Let's start with color grading. We manipulate color, and often contrast and exposure as well, to harmonize the image, to make sure that the story being told by the picture is the story that we want to tell. On a basic level, these kinds of adjustments are necessary because the image that comes out of your camera is never aligned perfectly with your vision for the picture.
After you've gotten comfortable with basic color adjustments, you can start to get bolder by making more stylistic changes. The more you work with colors, the more techniques you will learn to control them to help your storytelling.
RETOUCHING
The next level of image editing is basic retouching. Here we are fighting against all the unnecessary details that sneak into our frame and try to distract our viewer from what we want them to focus on. Removing crumples in clothing, or a stain on a wall, or a runaway strand of hair helps decrease the amount of visual noise in the image.
Photographic portraiture is an extraordinarily difficult medium. It freezes a person, and robs them of 99% of the information that viewers would normally use to understand their personality, their essence. The way they move, their gestures, their voice, even their smell—these factors aren't available to our viewers.
And when the brain is left starved for information, it starts noticing all the small details that we would normally ignore in any other context. Skin blemishes, smudged lipstick, cat hair on a sweater. The camera amplifies all of these for the viewer to study.
And these things complicate our task of telling a meaningful story about this character. If you're a chef and you've prepared a dish, do you want people to focus on the ingredients you put into it? Or do you want them to be immersed in the final result? This is the same with photography.
COMPOSITING
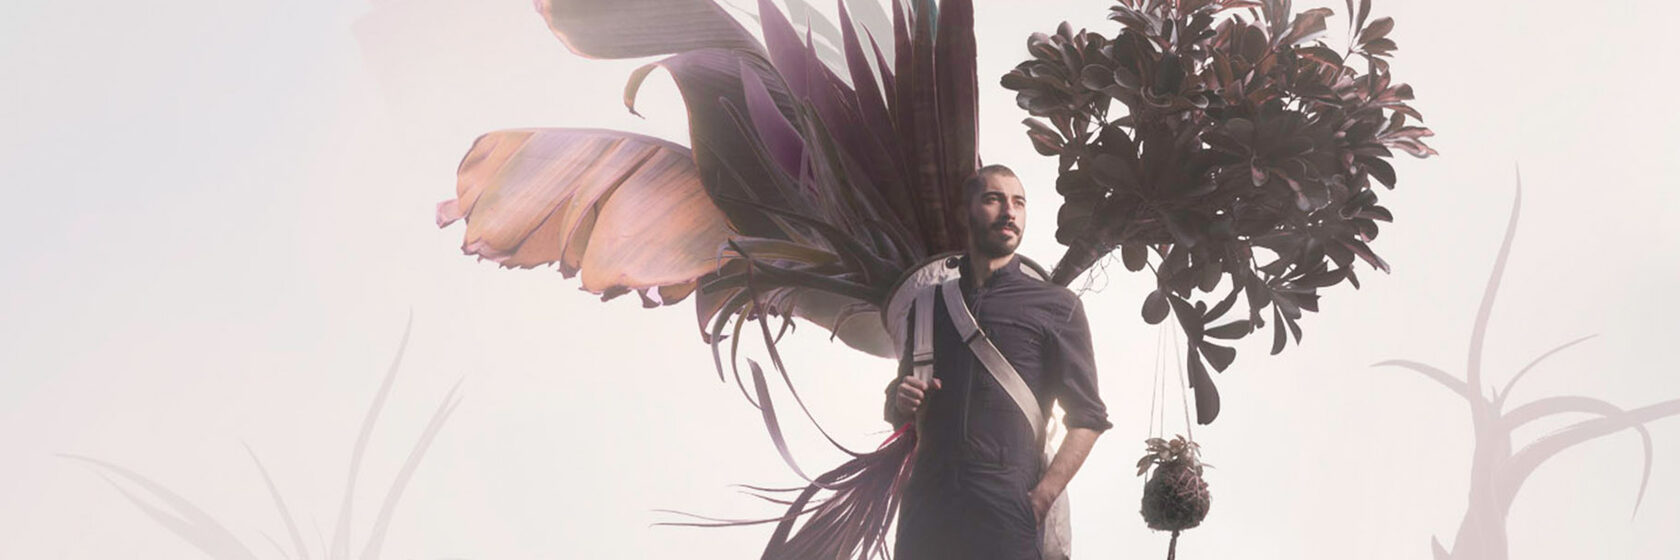
The most advanced editing technique that I use is compositing: assembling different elements in the frame that weren't part of the original photo.
This is a good example of how I use post-production as a storytelling tool. I always ask myself: how can editing make my storytelling stronger? How can it make the visual architecture of my image deeper and more exciting to look at.
Using smoke outdoors can be tricky. Shooting with a tripod allowed us to stitch together different images to make the smoke cover the whole space.
At the end of the day, it doesn't matter to me how a picture was produced. I don't care whether it was shot with a digital camera or on 8x10 film. Or if it was composited in Photoshop from 50 different images. To me what matters is that the picture is meaningful, honest, and capable of touching the viewer. This is what matters most.
EXPERIMENTS
Photoshop has been a powerful tool for my client projects, and I can't imagine working without it.
It's is a massive and incredibly complex program. How do you learn it all? You don't. You only need to learn a small percentage. And there are two ways we do this: one is when you're looking for a solutions for a specific task, such as a client project, and the other is through experimentation.
I've shot hundreds of tests over the years, and Photoshop experiments have been a large part of that journey.
Experiments allow you to innovate, to break the rules and try crazy new things without having to first convince a client that it's going to work! Don't be afraid of being corny or trashy or silly. You have to do this if you want to grow.
It is only by pushing our limits that we understand what's really possible to achieve! It is only by going outside your comfort zone that you will become the photographer and storyteller that you have the potential to be!
LESSON 11
ASSIGNMENT
ASSIGNMENT
PHOTOSHOP A PHOTO
For this assignment I want you to take one of the photos you've already shot in this course, and change the look of it in Photoshop. Send me both the before and after photos.
Format: Several photos (before and after) + text description
Deadline: April 18, 2022
Delivery: Upload JPG files (2048 pixels on the long side, up to 2MB file size) via the assignment form below, and copy your text into the text field provided.
Deadline: April 18, 2022
Delivery: Upload JPG files (2048 pixels on the long side, up to 2MB file size) via the assignment form below, and copy your text into the text field provided.
ASSIGNMENT #1
NEED HELP?
If you need help, have a question, want to share your idea and get my feedback — send me a note!
Everything that you see on this website was developed, produced, filmed, edited, structured and designed by Andrei Kovalev and his team, in collaboration with the Spéos Photo School. Please do not copy or redistribute it.