
LESSON 8
LESSON RECAP
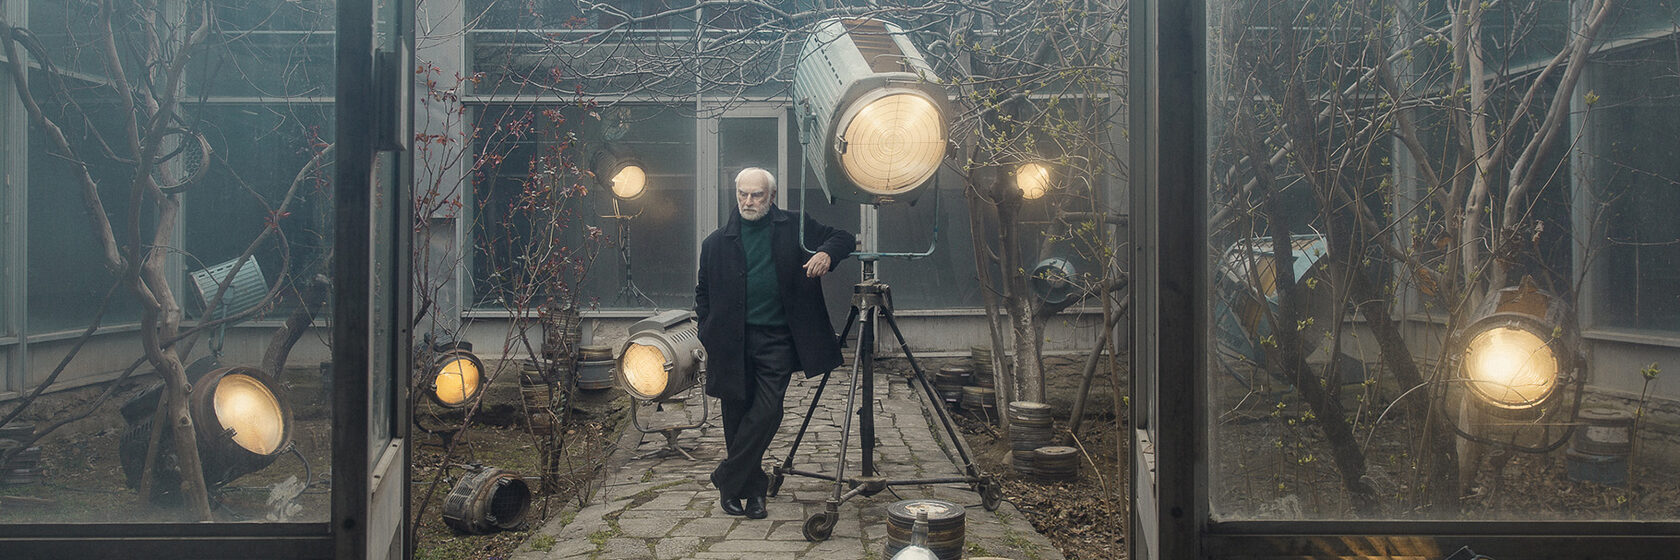
There is a part of photography that is beautifully mathematical. And this is especially true when it comes to lighting: the lighting ratios, the photographic exposure equation, and of course the inverse square law. But to me, these always seemed to complicate my mission instead of making it more manageable.
It's a lot like writing. If you learn how to write well and practice enough, you probably won't think very much about grammatical rules when you're writing your next book. Instead you will be hyper focused on what's truly important: on the wording, the style, and the story you want to tell.
My approach to working with light has been a little like this. From the very beginning I wanted to get so much practice with lighting that it would become subconscious, and intuitive. I wanted to see and feel light instead of thinking about the math and science behind it.
Yes of course you need to have a basic understanding of what the numbers on your flash and on your camera mean. But relying exclusively on those readings, letting them define our creative decisions, makes us technicians, not artists.
In the next chapters we're going to take a hard look at my approach to lighting. But before we get into that, let's talk for a minute about what light is. What do we use it for? And more importantly, how do we use it?
WHAT IS LIGHT?
The real key to understanding light is the role it plays in our pictures.
VOLUME AND DEPTH
Light gives shape to a space. It helps create depth and define volume. It makes a picture three-dimensional, or even two-dimensional if that is your intention.
CONTROLLING THE CONTEXT
Light can help you establish your frame's context, conceal unnecessary details, and focus the viewer's attention on your main idea.
SETTING THE MOOD
Light helps us create atmosphere and set the mood of our scene.
DESCRIBING CHARACTERS
Light can help develop our characters. It can draw attention to their state of mind or features of their appearance. It can introduce drama to their personal, or accent the character's inner peace.
LIGHT AS A CHARACTER
A lighting source can be present in your picture as a legitimate character, as a part of the story.
QUALITIES OF LIGHT
One of our main goals as visual artists is to tell a story. It doesn't matter if it's short or long, or if it's linear or abstract, or whether its goal is action-oriented or geared more toward character development. Every aspect of the shoot must work towards this one purpose.
Throughout my years of working with lighting, I have found that the easiest way to talk about light is to focus on the basic parameters that define it:
And when there are multiple light sources being used, there is an additional factor to consider: how we balance these factors against one another. How we make a symphony from individual instruments.
SOFTNESS
Let's talk about what makes a light soft or hard. A light's softness is defined by how gradually it transitions from highlight to shadow on its subject. Lights that cause sharp shadows are hard lights. Lights that wrap around their subjects gradually are softer lights.
When it comes to creating soft light, what is important to keep in mind is that the softness of a light is defined by how large the light source is with respect to the subject. To make the size of a light source larger, we add diffusion in front of the light. The larger and thicker the diffusion element, the softer the light.
The material you use to diffuse the light matters a lot. It can be anything, from paper diffusers to a white bedsheet, to atmospheric effects, like dense haze or smoke. With natural light, for example, clouds work as an enormous diffuser for the sun.
DIRECTION
When I was just getting started in controlled-light photography, I would often illuminate my scenes from the front, approximately from the same angle as the camera. This led to contrasty, vivid pictures. By regulating the fall-off, the size of the light spot, I could achieve a dramatic effect.
But with time, this approach became too flat to me, too obvious. So I started lighting my heroes from other directions, often using the beam's very edge to barely touch the subject. Eventually, I found myself shooting portraits by positioning a light so that it faces the camera from behind the subject. This was the exact opposite of the camera-side lighting I had started my career with.
The idea here is to never stop experimenting. Never stop trying new things and new approaches. The goal is to expand your toolbox. Having as many options as possible in your bag of tricks lets you better adapt your lighting to the concept in your head.
BALANCE
Now that we've talked about the softness and direction of lighting, I want to take a step back and look at how I balance all the light sources that affect my scene: strobes, available light, and continuous lighting like incandescent and fluorescent sources. This balance is more important than any single lighting decision.
When balancing light, it's important to understand how available light works in your frame so that then you can then make sure that the lighting you add doesn't compete with it. Balancing available and added lighting will enrich your picture, add more nuance to its texture, expand its tonal range, and make it more interesting and visually diverse.
Throughout my years of working with lighting, I have found that the easiest way to talk about light is to focus on the basic parameters that define it:
- the softness of a light
- the direction of a light
- its intensity
- and its color
And when there are multiple light sources being used, there is an additional factor to consider: how we balance these factors against one another. How we make a symphony from individual instruments.
SOFTNESS
Let's talk about what makes a light soft or hard. A light's softness is defined by how gradually it transitions from highlight to shadow on its subject. Lights that cause sharp shadows are hard lights. Lights that wrap around their subjects gradually are softer lights.
When it comes to creating soft light, what is important to keep in mind is that the softness of a light is defined by how large the light source is with respect to the subject. To make the size of a light source larger, we add diffusion in front of the light. The larger and thicker the diffusion element, the softer the light.
The material you use to diffuse the light matters a lot. It can be anything, from paper diffusers to a white bedsheet, to atmospheric effects, like dense haze or smoke. With natural light, for example, clouds work as an enormous diffuser for the sun.
DIRECTION
When I was just getting started in controlled-light photography, I would often illuminate my scenes from the front, approximately from the same angle as the camera. This led to contrasty, vivid pictures. By regulating the fall-off, the size of the light spot, I could achieve a dramatic effect.
But with time, this approach became too flat to me, too obvious. So I started lighting my heroes from other directions, often using the beam's very edge to barely touch the subject. Eventually, I found myself shooting portraits by positioning a light so that it faces the camera from behind the subject. This was the exact opposite of the camera-side lighting I had started my career with.
The idea here is to never stop experimenting. Never stop trying new things and new approaches. The goal is to expand your toolbox. Having as many options as possible in your bag of tricks lets you better adapt your lighting to the concept in your head.
BALANCE
Now that we've talked about the softness and direction of lighting, I want to take a step back and look at how I balance all the light sources that affect my scene: strobes, available light, and continuous lighting like incandescent and fluorescent sources. This balance is more important than any single lighting decision.
When balancing light, it's important to understand how available light works in your frame so that then you can then make sure that the lighting you add doesn't compete with it. Balancing available and added lighting will enrich your picture, add more nuance to its texture, expand its tonal range, and make it more interesting and visually diverse.
LOOKING FOR BALANCE
Let's dive deeper for a minute into the technical side of lighting.
When it comes to continuous lighting — the sun, incandescent bulbs, or your phone's flashlight — you can control it's intensity by changing how long that light hits the sensor (or film plane) in your camera.
In general, a strobe's intensity is not affected by this parameter. How a flash affects the picture won't change whether you are shooting at 1/20th of a second or 1/200th. But all continuous lights will!
Out of three main camera settings—ISO, aperture, and shutter speed—only shutter speed affects continuous lighting exclusively. Whereas changing the ISO or changing the aperture will influence the visibility of both kinds of light.
So if you close down the aperture, the intensity of both ambient lighting and strobe lighting are affected. If you increase the ISO, you increase the intensity of both lights in the image. But if you change the exposure time, the ambient light changes but the strobe lighting stays the same.
The more you practice balancing your lights, the more complex problems you can solve when shooting.
My usual workflow starts with capturing available light and then adding my lights to it. It can be strobes, film and video lighting, or DIY-style sources, like simple fluorescent tubes. Fine adjustments are made using camera settings and small changes to the light sources themselves.
In the upcoming sections we will dive deeper into how we control light, but it's important to understand that the best thing you can do to develop a solid intuition about light is to go out and start lighting as many sets and as many subjects as possible. Lessons like this one will help you understand the fundamentals, but if you really want to get good at lighting, you need to spend a lot of time doing it.
This brings me to one of my favorite rules: never stop working, never stop practicing. If you don't have an assignment, come up with one for yourself.
LESSON 8
ASSIGNMENT
ASSIGNMENT
NEW LIGHTING SET-UP
The only way to get better at lighting is to go out and light different set-ups. For this lesson's assignment I want you to shoot a new scene where you control the lighting. Your lighting set-up should include at least two different types of sources, of at least two different colors. You could use strobe lighting combined with the sun, or incandescent bulbs combined with natural light from a window, or something else entirely. Send me a photo or a diagram of your lighting setup as well.
Format: 1-5 images + text description
Deadline: March 25, 2022
Delivery: Upload JPG files (2048 pixels on the long side, up to 2MB file size) via the assignment form below, and copy your text into the text field provided.
Deadline: March 25, 2022
Delivery: Upload JPG files (2048 pixels on the long side, up to 2MB file size) via the assignment form below, and copy your text into the text field provided.
ASSIGNMENT #1
NEED HELP?
If you need help, have a question, want to share your idea and get my feedback — send me a note!
Everything that you see on this website was developed, produced, filmed, edited, structured and designed by Andrei Kovalev and his team, in collaboration with the Spéos Photo School. Please do not copy or redistribute it.